Contents
Creating a NAT Virtual Network
The guests connected through a NAT network aren't visible to the outside world.
This generally makes them the easiest type of virtual network for working with.
Step one: Host properties
To create a virtual network with the Virtual Machine Manager tool, you need to go into the "Host properties" screen for the host it will be created on.
You can do that by selecting the host in question, right clicking on it with the mouse, then choosing the "Properties" context menu icon.
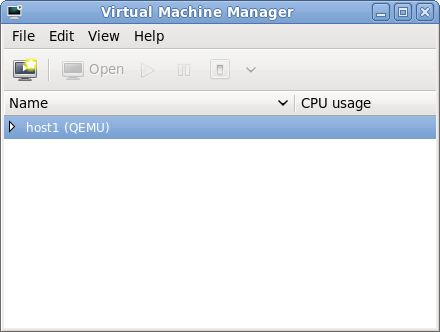
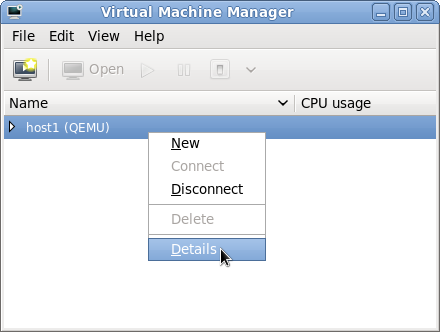
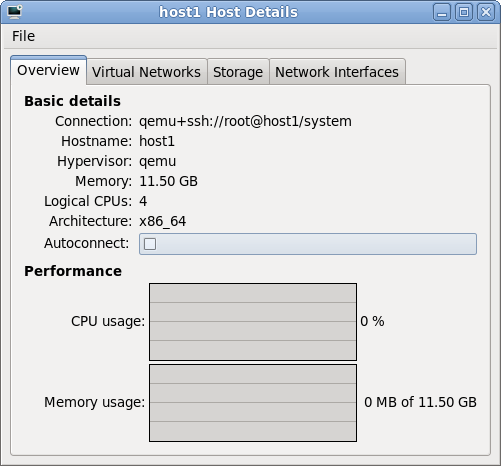
This will open a new dialog, where host level details can be managed.
When it first opens, you will be on the "Overview" tab.
Step two: Virtual Networks tab
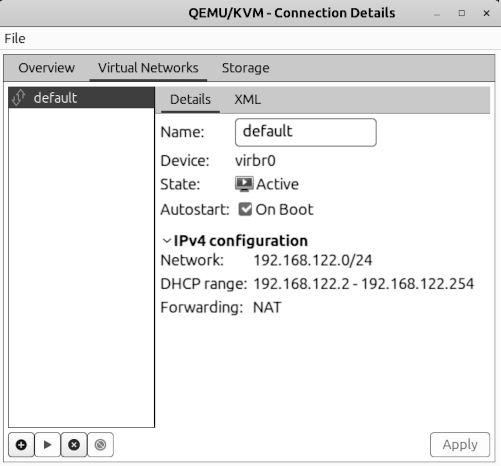
Click on the "Virtual Networks" tab. This will look similar to the screenshot below:
Step three: Start the New Virtual Network assistant
In the bottom left corner of the dialog, there is a button with a plus sign "+" on it. Click on it to start the "New Virtual Network" assistant.
NOTE - The screenshot below needs to have some kind of highlight added pointing to the "+" button to add a new virtual network

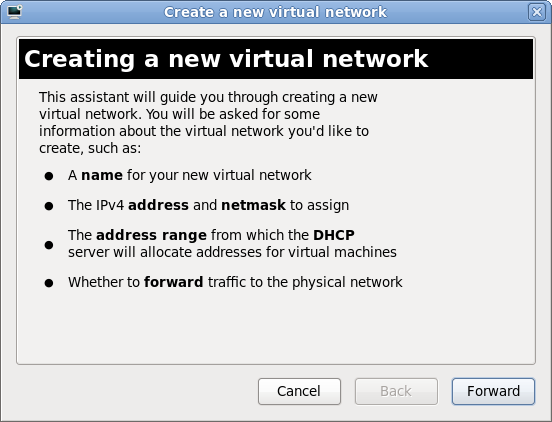
The first page of the assistant appears, click the "Forward" button.
Step four: Choose a name
In this step, you choose a name for the new NAT network. Use something descriptive you won't forget.
If you know you'll be using command line tools with this virtual network, then choose a name that's easy to type.
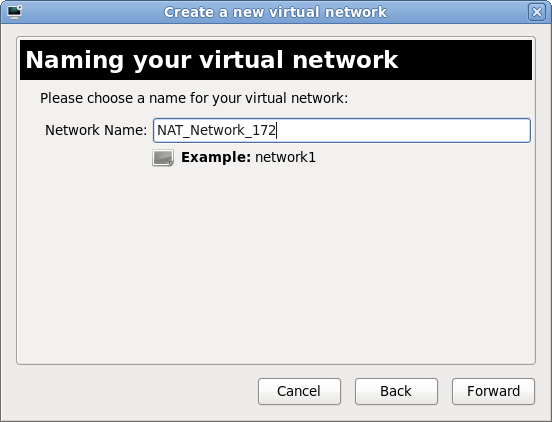
We've used the name NAT_Network_172 here, as it's fairly descriptive.
Step five: Choose an IP address range
In this step, you choose a range of IP addresses to use inside this virtual network. They will be visible to all guests using this virtual network, but won't be seen outside of it due to the NAT.
The key concept here is choosing an address range big enough to accommodate your guests, and that won't interfere with routing externally. It's a good idea to use one of the IPv4 private addresses ranges, as mentioned in the dialog:
10.0.0.0/8
172.16.0.0/12
192.168.0.0/16
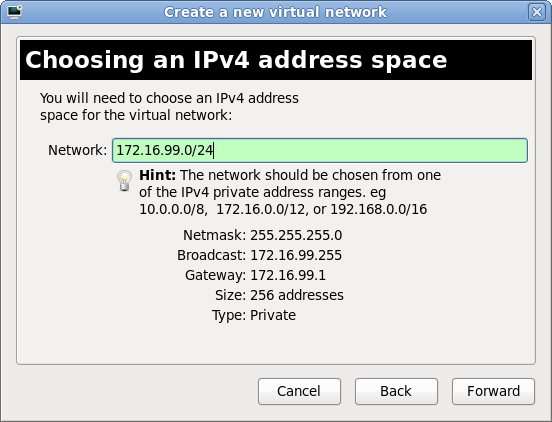
In this example, we're using the range 172.16.99.0/24 (for no particular reason).
Step six: Choose a DHCP address range
In this step, you choose a range of IP addresses for the DHCP server to assign to guests. This DHCP server and address range are only visible inside this specific NAT network, and won't be seen outside of it.
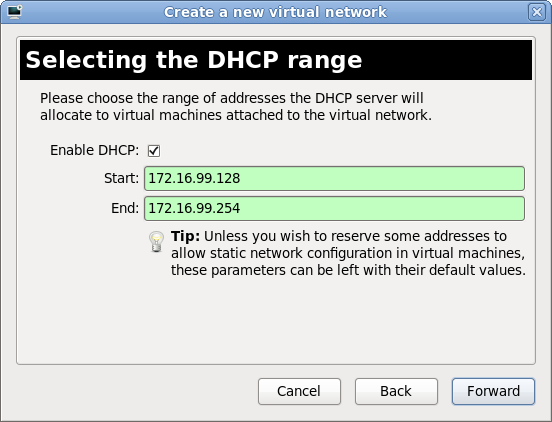
In this example, we chose the range 172.16.99.128 through 172.16.99.254.
This leaves the range 172.16.99.2 through 172.16.99.127 unallocated by DHCP, so you can statically assign IP addresses in it.
DIAGRAM HERE - Show the address range breakup:
172.16.99.1 = gateway
172.16.99.2 - 127 = static assignment (untouched by DHCP)
172.16.99.128 - 254 = DHCP server assigned
172.16.99.255 = broadcast address
Step seven: Choose the type of virtual network
This is where you choose whether your network is to be NAT, Routed, or Isolated.
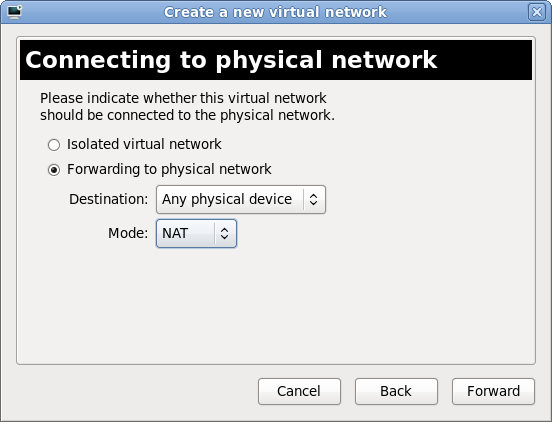
We chose NAT for this this example.
Step eight: Finish the virtual network creation
Check the settings are how you want them.
Click the "Finish" button if they are correct.
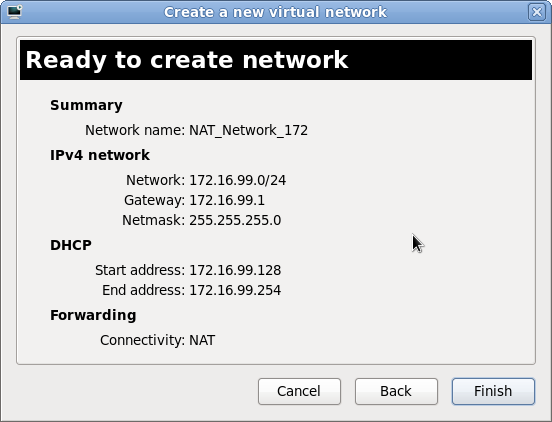
The assistant will now use the settings, and create the new virtual network.
Last step: Verify
Select your newly created virtual network in the left side of the dialog box. The settings in use for it will be shown on the right.
Verify they are how you to expect them to be.
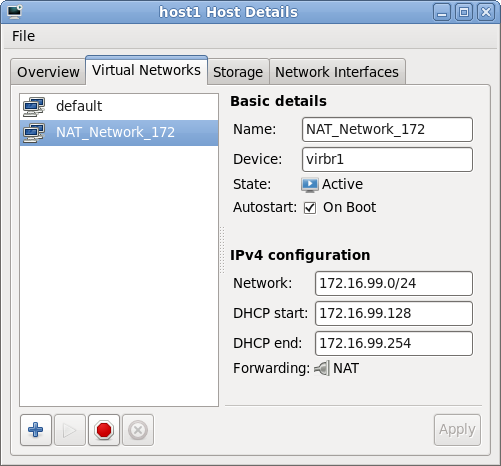
Using your new virtual network
After the virtual network has been created, any subsequent guests you create or edit can be configured to use it.
For example, below we are creating a brand new guest using the Virtual Machine Manager. In the list of virtual networks the guest can connect to, we've chosen the new NAT_Network_172 virtual network.
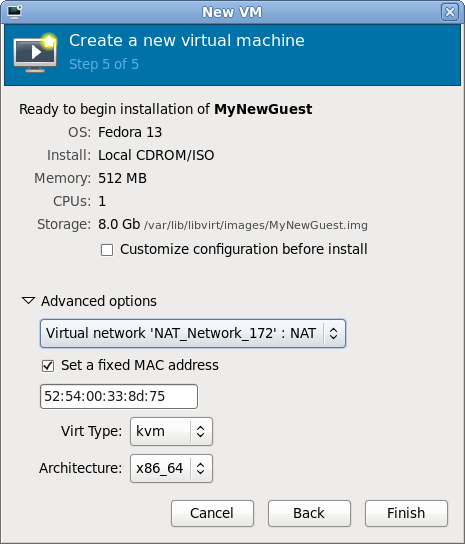
NOTE - Would be good to adjust the screenshot, adding some sort of arrow and/or highlight to the selected virtual network field
We choose this virtual network, so when the guest is started, it will be connected to the host through it.
PIC GOES HERE SHOWING IP ADDRESS AND NAT CONNECTIVITY